Your car battery supplies the electrical power needed to start the engine and run accessories. It converts chemical energy into the steady current that wakes every system when you turn the key.
A normal battery will lose charge over time. Leaving lights on overnight or long periods of inactivity speeds that wear and shortens useful life.
A parasitic battery drain happens when an electrical fault keeps drawing energy while the vehicle sits. This unseen load can leave you stranded and force early replacement of a vital component.
Watch for slow cranking, dim lights, or the need for frequent jump starts. Regular checks help spot issues before they become costly. Monitor your vehicle at night and inspect circuits if your car battery fails more often than expected.
Key Takeaways
- The battery converts chemical energy into power for the engine and accessories.
- Leaving lights on accelerates wear and shortens battery life.
- An unseen drain can consume energy while the vehicle is parked.
- Look for slow starts and dim lighting as early warning signs.
- Regular monitoring helps prevent unexpected failures and saves time and cost.
Understanding Parasitic Battery Drain in Your Volvo
Even when your engine is off, small systems can quietly pull current from the battery. This ongoing flow is called a parasitic draw when it exceeds normal levels and causes starting issues.

What is Parasitic Draw
A parasitic draw happens when a vehicle continues to draw power after shutdown. Some items, like the clock or security module, use minimal current by design. Excessive draw, however, is an issue that can leave you with a dead cell and a stalled morning.
Normal vs Abnormal Drain
Normal draw in most modern cars runs between 50 and 85 milliamps. Older vehicles should be under 50 milliamps.
Abnormal draw often stems from short circuits, faulty alternator diodes, or interior lights left on. Strange headlight behavior or intermittent accessory faults can point to common causes parasitic battery problems.
- Distinguish normal electrical usage from an excessive draw.
- Watch for odd component behavior; it often hints at an underlying issue.
- For detailed steps and diagnostics, see this Volvo resource.
| Measurement | Normal Range | Common Causes | Recommended Action |
|---|---|---|---|
| Modern cars | 50–85 mA | Clock, security module | Monitor overnight; retest |
| Older cars | Older accessories | Inspect wiring and modules | |
| Excessive draw | > 85 mA | Shorts, diodes, lights left on | Isolate circuit; perform amp test |
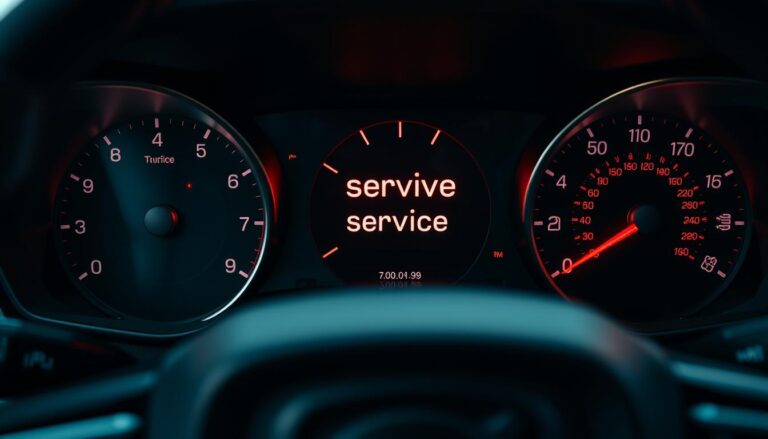
Common Signs of a Failing Battery
You can spot a dying battery by simple, everyday symptoms at startup. Pay attention; early recognition saves time and prevents unexpected failures.
One common sign is a rapid clicking noise when you turn the key. That sound usually means the starter isn’t getting enough current.
If your headlights look dim or the radio struggles to power on, your electrical components may be underpowered. These symptoms often point to a weak cell or an ongoing parasitic battery drain.
Frequent jump starts are a clear indicator that the car battery needs professional inspection or replacement. A worn battery can also cause intermittent sparks that lead to engine backfiring.
“Dashboard lights illuminate but the engine won’t crank — that’s a strong sign of a significant drain or failing part.”
Watch for these signs and note when they occur. Catching problems early helps you address the common causes and avoid roadside trouble.

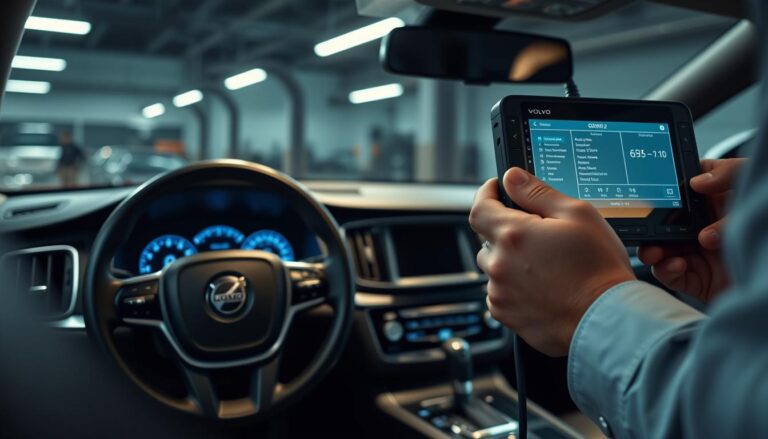
Preparing for Your Electrical Diagnostic Test
Before you begin any electrical checks, gather the correct meters and safety gear. A short setup prevents mistakes and speeds accurate results.
Essential tools for the job
A reliable digital multimeter is the primary instrument for a battery draw test. Confirm the cell reads between 12.2 and 12.6 volts before starting. If the voltage is low, top the battery with a charging pack so readings remain stable.
Wear protective gloves and eyewear while you work. Safety keeps you focused and prevents injury if a terminal sparks.
Quick setup checklist
- Use a quality digital multimeter and set it for current (A).
- Place the red lead in the “A” port and the black lead in COM for amp testing.
- Do not open doors or switch accessories while the meter is connected; avoid heavy loads on the meter.
These simple steps help you measure the vehicle draw accurately and protect both you and the battery during the test.
How to fix parasitic battery drain on my Volvo car?
Start safely and methodically. Begin by disconnecting the negative cable and keeping the vehicle closed so systems settle. This prevents accidental shorts and gives a true resting draw.
Setting Up the Multimeter
Use a quality multimeter and set it for milliamps. Place the meter in series with the negative terminal and the disconnected cable.
Remember: 1 amp equals 1000 milliamps. Measure on the negative side so a grounding slip won’t energize the whole system.
Isolating Circuits via Fuses
With the meter connected, pull fuses one at a time from the fuse box. Watch the reading as you remove each fuse.
If the amp value drops when a fuse is removed, that circuit likely contains the faulty component. Check radio, interior lights, door switches, and modules listed in the owner’s manual.
Interpreting Amp Readings
A resting draw above 50 milliamps in modern cars indicates an issue. Older models may run lower.
Log readings and note which fuse caused the drop. Use the table below for quick guidance and next steps.
| Reading | Likely Source | Action |
|---|---|---|
| < 50 mA | Normal systems (clock, security) | Monitor; no immediate action |
| 50–85 mA | Borderline draw | Inspect wiring, check interior lights and door switches |
| > 85 mA | Excessive draw (radio, stuck relay, light) | Isolate circuit; replace faulty part or seek repair |
Troubleshooting Volvo Specific Electrical Components
Begin with the driver’s door area — many Volvo owners find the sneakiest draw there.
Why doors matter: On 240 models with central locking, silicone insulation on door wires often breaks down. Exposed conductors can short when the door moves and cause an unseen drain.
For a 242, disconnect the five-wire plug above the driver’s knee. The red, green, black, yellow, and blue wires feed the door. Unplugging this connector can isolate the door harness without pulling fuses.
Also inspect for moisture. Water in the heater core area or relay box can make electrical components draw power. Check the glovebox light and the interior light delay relay; they are common sources in older cars.
Look at rear wiring if a CD stacker was fitted. Cables that sit in pooled water or frayed insulation often cause continuing draw and erratic radio behavior.
| Location | Likely Source | Action |
|---|---|---|
| Driver’s door | Central lock wiring shorts | Unplug five-wire connector; inspect insulation |
| Heater core / relay box | Moisture causing shorts | Dry area; replace corroded relays |
| Glovebox / rear wiring | Interior lights or wet cables | Check light switches; route and seal wiring |
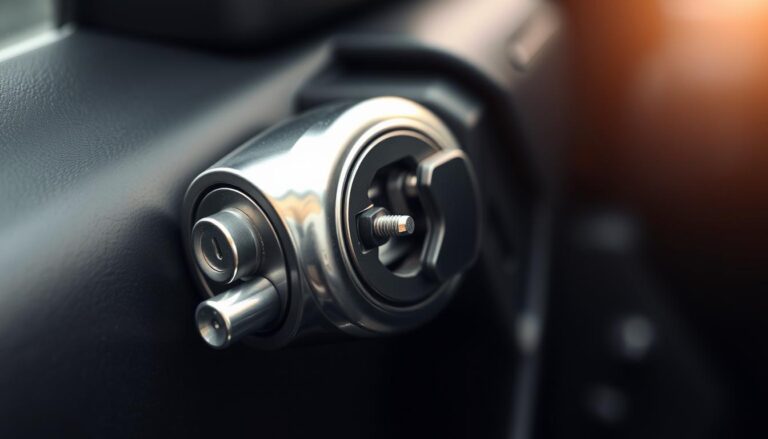
For guidance on related ignition or switch faults, see this ignition switch guide.
When to Seek Professional Automotive Repair
When electrical faults hide deep inside wiring harnesses, you may need expert help to find them.
Take your vehicle to a qualified repair center if you cannot identify the source of a persistent parasitic battery drain. Trained technicians use wiring diagrams and factory tools that reveal faults a visual check can miss.
If your battery needs frequent replacement, request a full diagnostic. A shop will test the alternator, starter, and charging system and confirm whether a failing alternator or a parasitic load causes repeated problems.
Students at the Universal Technical Institute learn this exact work during a 51-week Automotive Technology program. They train on vehicle electronics, which mirrors the testing and repair steps used in professional shops.
| Symptom | Likely Source | Professional Action |
|---|---|---|
| Frequent no-starts | Excessive draw or weak cell | Conduct full amp test; inspect alternator |
| Intermittent electronics | Faulty module or wiring | Use wiring diagrams; perform bench tests |
| Repeated replacement needed | Charging system failure | Load test alternator; replace faulty parts |
Relying on professionals ensures repairs meet manufacturer standards and reduces the chance of repeat failures. For serious electrical issues, this path saves time and prevents further damage.
Conclusion
Regular monitoring of current draw keeps most electrical issues from becoming expensive.
Use a multimeter to spot a parasitic draw and isolate the circuit. A clear amp reading points you toward the faulty part and helps plan any needed repair.
Remember that normal draw exists, but a reading well above 50 mA signals a problem. That small battery drain can sap starting power and shorten service life.
Check door switches, interior lights, and other common components first. These simple checks save time and often fix the issue without deep wiring work.
If the diagnosis becomes complex, seek professional help. A trained shop can protect sensitive electronics and restore reliable power quickly.
FAQ
What is a parasitic draw and why does it matter?
A parasitic draw is any electrical load that continues to pull current from a vehicle battery when the ignition is off. Small draws for things like clock memory are normal; excessive loads will deplete the battery, leave you stranded, and can shorten battery life.
What are common causes of continuous battery power loss in Volvos?
Frequent causes include interior lights left on, faulty glovebox or trunk switches, malfunctioning infotainment or alarm systems, failing control modules (BCM/ECM), aftermarket wiring, and corroded or loose battery terminals. Sticking relays and faulty headlight switches can also keep circuits energized.
How can I tell normal drain from an abnormal one?
Normal quiescent draw is typically under 50 milliamps in modern vehicles. If you measure several hundred milliamps or more, that indicates an abnormal draw. Also notice rapid battery voltage drop after sitting overnight or repeated need to jump-start the vehicle.
What tools should I gather for an electrical diagnostic test?
Essential tools include a digital multimeter capable of measuring milliamps, a good set of insulated fuse pullers, basic hand tools, a battery charger or maintainer, and the vehicle’s fuse diagram. Safety gloves and eye protection are also recommended.
How do I set up the multimeter for current testing?
With the car off and keys removed, disconnect the negative battery cable. Connect the multimeter in series between the negative terminal and the disconnected cable. Use the correct lead position and range for milliamps. Ensure doors are closed and modules have entered sleep before reading.
What’s the best method to isolate a high-draw circuit using fuses?
With the meter still in series, pull fuses one at a time while watching the amp reading. When the current drops significantly after removing a specific fuse, the circuit protected by that fuse is the primary suspect. Check each component on that circuit.
How do I interpret amp readings during the test?
Readings below 50 mA are generally acceptable. 50–200 mA could be borderline depending on vehicle. Readings above 200 mA usually indicate a problem that needs investigation. Very high current implies a short or stuck device that draws substantial power.
Which Volvo-specific systems often cause electrical load issues?
Common Volvo offenders include the Sensus infotainment unit, alarm and immobilizer modules, door modules, trunk and fuel door actuators, and the body control module. Older Volvo models may also suffer from corroded connectors and grounding issues.
Can aftermarket equipment create a constant power draw?
Yes. Poorly installed alarms, remote start systems, amplifiers, or wired chargers often bypass proper ignition-switched circuits and can draw current with the car off. Inspect aftermarket wiring for constant 12V taps and incorrect grounding.
What quick checks can I perform before detailed diagnostics?
Confirm all interior and exterior lights are off, ensure the trunk and glovebox latch sensors are working, remove phone chargers and accessories, and check battery terminals for tightness and corrosion. Sometimes a simple loose cable or a light left on is the culprit.
When should I replace the battery versus continuing the investigation?
If the battery is old (typically over 4–6 years), fails load testing, or cannot hold charge even after charging, replacement makes sense. However, replacing a healthy battery without resolving the underlying draw only delays repeat failures.
When is professional automotive repair recommended?
Seek professional help if the draw source is elusive, if complex modules or CAN-bus diagnostics are required, or if you lack diagnostic tools. Certified technicians have access to Volvo-specific wiring diagrams and OEM scan tools that speed diagnosis and repair.
What safety precautions should I follow when testing electrical circuits?
Always disconnect the battery before changing connections, use insulated tools, avoid shorting positive to ground, and follow meter manufacturer instructions. Allow modules to enter sleep state to avoid misleading readings and prevent data loss by noting radio or security codes before disconnecting power.