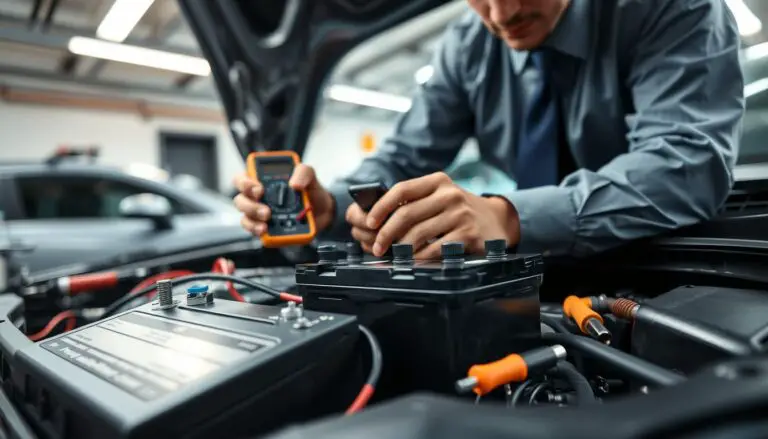
Len from 1A Auto walks through a front brake job on a 2004 Volvo XC90. This short guide gives a clear view of each step you will follow when you replace front components.
When you decide on a front brake replacement, gather the right parts from a reliable shop like 1A Auto. The correct part choices matter for safety and long life.
This article breaks the process into simple steps. It covers wheel removal, inspecting rotors and pads, and the actual replacement work. You will learn how much time the job may take and which parts to expect.
Whether you are new or experienced, these instructions help you manage the wheel assembly and pad service with confidence. Taking care of the brake system protects passengers and extends vehicle life.
Key Takeaways
- Use quality parts from a trusted shop for a reliable replacement.
- The guide presents a clear, step-by-step view of the front brake job.
- Inspect wheel and rotor condition before you start work.
- Allow enough time for a careful, safe repair process.
- These instructions suit both novice and experienced DIYers.
Understanding Your Volvo XC90 Braking System
Begin with a quick check of rotor sizes and system layout before any service. This step prevents part mismatch and keeps the job efficient.

Identifying Brake Sizes
You can confirm whether your vehicle uses 316mm or 336mm rotors without removing the wheel. Look for the part number stamped on the rotor face. That mark tells you which rotor fits your model and avoids ordering the wrong item.
Safety Precautions
Always service components in pairs. Replace both front brakes together and both rear brakes together for balanced stopping power and steady handling.
- Check rotor stamp for 316mm or 336mm before ordering parts.
- Service front brake and rear brake systems in pairs for safety.
- Follow the correct procedure for your specific model to avoid incompatibility.
- Ensure the vehicle is properly supported and stable before starting work.
- Learn the rear layout so you avoid common mistakes during maintenance.
Essential Tools for the Job
Gathering the right gear before you lift the car keeps the job smooth and safe.
Must-have tools for a front brake service on a volvo xc90 include a 19mm socket, 10mm and 18mm sockets, and a 7mm hex bit.
Bring a breaker bar and a reliable torque wrench. These help remove stubborn bolts and ensure proper tightening when you reinstall parts.
Keep a sturdy ratchet and clean parts organized on a tray. That saves time and cuts mistakes during the replacement.

- 19mm socket — wheel studs and caliper bolts
- 10mm socket — rotor retaining bolt
- 7mm hex bit — caliper slider pins
- Breaker bar and torque wrench — loosening and final torque
- Ratchet and small hand tools — general use
| Tool | Use | Recommended |
|---|---|---|
| 19mm socket | Main lug and caliper bolts | Chrome vanadium set |
| 7mm hex bit | Caliper slider removal | Hardened steel bit |
| Torque wrench | Final tightening to spec | Click-style, 10–150 ft-lb |
| Breaker bar | Loosen seized fasteners | 24–36 inch bar |
How to fix worn brake pads on a XC90?
Begin with preparation. Park the Volvo XC90 on level ground and support it securely. Confirm the correct brake pad set and the piston retraction tool are ready.
Follow a clear sequence: remove the wheel, unbolt the caliper, and slide out the old pad set. Retract the piston slowly using the proper tool so the new pads fit without forcing the caliper.
- Remove wheel and caliper assembly.
- Extract old pads and inspect the pad hardware and piston condition.
- Retract piston, fit the new pad set, and reassemble in reverse order.
Each part of the pad set must seat correctly. Check the pad backing, wear indicators, and any shims before final assembly.
Final check: After installation, pump the pedal until firm and test at low speed. This step confirms piston seating and correct operation of the front brakes.
| Task | Why it matters | Quick tip |
|---|---|---|
| Verify pad set | Ensures fit and performance | Match part numbers before work |
| Piston retraction | Creates space for new pads | Use a spreader or piston tool slowly |
| Post-install check | Confirms safe braking feel | Pump pedal and road-test carefully |
Preparing the Vehicle for Maintenance
Start by parking on level ground and confirming the parking brake holds. This simple check sets a safe baseline before you begin any brake work on your Volvo XC90.
Securing the Vehicle
Loosen the lug nuts while the wheel is still on the ground. This prevents the hub from spinning and saves time once the car is lifted.
Once lug nuts are loosened, raise the car and support it with jack stands. Make sure the stands sit under solid points on the frame so the rear and wheel areas stay stable.
- Before you start the replacement, verify the vehicle is firmly supported on jack stands after loosening the lug nuts.
- Take the time to secure the Volvo XC90. This keeps the wheel and rear suspension steady during every step.
- Double-check lug nuts are loose before lifting to avoid dangerous hub spin.
- Proper preparation saves time and lets you focus on the brake maintenance steps without worry.
Removing the Wheel and Caliper Assembly
With the Volvo XC90 secure on a level surface, remove the decorative caps and use a 19mm thin-wall socket to break the lug nuts free. Keep the vehicle stable and only raise it after lug bolts are loosened.
Loosening Lug Bolts
Use the 19mm socket on each lug until they spin freely. This saves time once the car is lifted and prevents hub rotation while you work on the wheel.
Managing the Caliper
After the wheel is off, remove the two 18mm bolts that secure the brake caliper to the rear brake assembly. A breaker bar gives the leverage needed when bolts resist.
Handle the caliper carefully. Support the assembly so the flex hose does not take the load. Let the caliper hang on a hook or rest it on a padded surface.
- Remove caps, loosen lug nuts with a 19mm socket.
- Take off the wheel and locate the two 18mm caliper bolts.
- Use a breaker bar where needed and avoid stressing the flex hose.
- This step gives clear access to the pads and rotor for the upcoming replacement.
| Action | Tool | Tip |
|---|---|---|
| Loosen lug bolts | 19mm thin-wall socket | Remove decorative caps first |
| Remove caliper bolts | 18mm socket + breaker bar | Apply steady force, avoid rounding heads |
| Support caliper | Hanger or padded block | Don’t let the caliper hang by the hose |
Extracting the Old Brake Pads
Use steady pressure with a flat screwdriver to ease each pad free without stressing nearby parts. Work slowly after the caliper is removed from the bracket so you avoid gouging the caliper housing.
Once a pad pops free, set it aside for inspection. Look at the piston and the boot for any signs of leaks or tears. A damaged piston will need attention before new pads go in.
Take your time. Prying the pad out can feel tight. Rushing may nick the caliper or the rotor edge and cause extra work during replacement.
- Use a flat-head screwdriver behind the backing plate and lever gently.
- Keep the work area clean so dirt does not enter the caliper bore.
- Inspect the piston for fluid stains or scoring after each pad removal.
Final check: Confirm all old material is removed and the caliper bracket is clear. This step ensures the new brake pads seat correctly and the replacement goes smoothly.
Servicing the Brake Rotor and Hub
A clean hub face ensures the new rotor aligns without wobble. This short step reduces vibration and helps the new rotor sit flat against the hub.
Begin by scrubbing the hub flange with a wire brush. Remove rust, corrosion, and old gasket material so the contact area is smooth.
Use a quality brake cleaner on the rotor surface before installation. That removes protective oils and improves contact with the new pads.
Install the rotor and secure it with the 10mm retaining bolt. Tighten hand‑tight first, then snug with the correct socket while keeping the rotor centered.
“A properly seated rotor is the foundation of a quiet, long‑lasting brake job.”
Quick checklist
- Clean hub face with wire brush and brake cleaner.
- Align rotor, fit the 10mm retaining bolt.
- Verify no debris remains under the rotor before final torque.
| Action | Why it matters | Tool |
|---|---|---|
| Clean hub surface | Prevents rotor runout and vibration | Wire brush, brake cleaner |
| Fit new rotor | Ensures flat mating with hub | Hands and 10mm socket |
| Secure retaining bolt | Keeps rotor aligned during reassembly | 10mm socket, torque as spec |
Preparing the Caliper Piston and Slider Pins
Start this step by removing the slider pins with a 7mm Allen bit and laying parts on a clean tray.
Remove the two guide pins with the 7mm Allen head. Clean each pin with brake cleaner, then inspect for corrosion or scoring.
Make sure the pin bores in the caliper bracket are free of dirt. Lightly lubricate pins with high-temperature caliper grease before reinstallation.
“Proper pin care keeps the caliper sliding smoothly and extends pad life.”
Fully retract the piston using a spreader or retractor tool so the new pads fit inside the caliper area. Inspect the rubber boot for tears or moisture; replace the caliper if the seal is compromised.
- Use a 7mm Allen bit for slider pin removal.
- Clean and lubricate pins before putting them back.
- Confirm piston is fully retracted and boot condition is good.
| Item | Check | Tip |
|---|---|---|
| Slider pins | Clean, smooth, lubricated | Use caliper grease |
| Piston | Fully retracted, boot intact | Use a proper piston tool |
| Reassembly area | Debris-free | Keep parts on a clean tray |
Installing New Brake Pads
Positioning the pads correctly now prevents noise and ensures steady stopping power later. Work in a clean area and keep the parts organized before installation.
Inner Pad Placement
Clip the inner pad into the piston pocket first. Make sure the pad backing seats against the piston face and the wear indicator aligns with the caliper opening.
Confirm the pad sits snugly and will not shift when you compress the caliper. This keeps the piston from pushing the pad out of position during operation.
Outer Pad Seating
Seat the outer pad into the caliper bracket next. Follow the correct order for hardware so the pad set fits flush against the rotor.
Check that anti‑rattle clips are in place and that the outer pad cannot move freely in the bracket. When both inner pad and outer pad are seated, the caliper should slide over the rotor smoothly.
- Verify parts are the right part and in the correct order before final assembly.
- Listen for any play by tapping the pads; no rattle should be present.
“Correct pad placement is the core of a safe replacement and reliable stopping power.”
Reassembling the Brake Components
Set the caliper over the rotor, confirm piston position, and prepare the two bolts for reinstallation.
Seat the retaining spring and check that the inner and outer pads sit in the correct order. A properly seated spring prevents vibration and keeps the pad from slipping during operation.
Hand-start the two 18mm bolts so threads align. Use a ratchet with the correct socket and tighten each bolt evenly. Finish with a torque setting that matches the manufacturer’s spec.
Double-check the assembly order before you lower the car. Confirm the piston is flush and the caliper moves freely on its guides.
“Secure bolts and a seated spring are the final steps that guarantee safe stopping performance.”
| Step | Detail | Tool |
|---|---|---|
| Position caliper | Align over pads and rotor, verify piston | Hands |
| Secure bolts | Install two 18mm bolts, tighten to spec | Ratchet + 18mm socket, torque wrench |
| Check spring & order | Ensure retaining spring and pad order are correct | Visual inspection |
- Reinstall caliper with two bolts removed earlier.
- Make sure the retaining spring is correctly positioned.
- Tighten bolts using the right socket and torque to spec.
Finalizing the Wheel Installation and Torque
The last mechanical step is critical: seat the wheel, fit the caps, and complete the final torque sequence. This makes sure the assembly stays secure and ready for the road.
Torque Specifications
Use a torque wrench and tighten the lug nuts to 103 foot pounds. Work in a star pattern so the wheel seats evenly against the hub.
- Torque method: Set the torque wrench to 103 ft‑lb and tighten lug nuts in a star pattern.
- Tool tips: Use a thin‑wall socket with the torque wrench to avoid marring the wheel finish. A ratchet and the proper bit help start threads straight.
- Why it matters: Correct torque prevents lug nuts from loosening and protects the caliper, bolts, and pads you just serviced.
- Final check: After lowering, recheck torque once the vehicle has been driven a short distance.
“Torque the lug nuts to spec and follow the star order for even seating and safe operation.”
Make sure wheel caps and any hardware are reinstalled. That completes this step and closes the job to professional standards.
Conclusion
Finish by verifying component seating, torque values, and a firm pedal feel. Walk around the vehicle and check the wheel torque pattern, the pad set fit, and that no tools or debris remain in the work area.
Regular service extends part life and helps keep stopping performance steady. Inspect brake pads routinely and follow the procedure schedule that matches your driving habits and conditions.
If you need additional parts for a future shop job, 1A Auto is a reliable source for every part you might require. With these final checks complete, your Volvo is ready for a careful road test and safe daily use.
FAQ
What tools are required for a brake pad replacement on a Volvo XC90?
You’ll need a floor jack and jack stands, a torque wrench, a socket set (including the correct bit for caliper bolts), a ratchet, a C-clamp or piston tool, a flat screwdriver or pry bar, brake cleaner, thread locker, and a brake pad set matched to your model year. Keep gloves and eye protection handy.
How do I identify the correct pad and rotor size for my XC90?
Check your owner’s manual or the VIN-stamped parts lookup at a Volvo dealer or trusted parts website. Measure the rotor diameter and note caliper type for front versus rear. A correct pad set listing will specify front or rear and the model years it fits.
What safety steps must I take before starting work?
Park on level ground, set the parking brake, and chock the opposite wheels. Use jack stands after lifting the vehicle—never rely on the jack alone. Wear safety glasses and nitrile gloves. Keep the brake fluid reservoir cap closed to avoid contamination.
What’s the proper sequence for removing the wheel and caliper?
Loosen lug nuts slightly while the car is on the ground. Lift and secure with jack stands, remove the wheel, then unbolt the caliper mounting bolts. Support the caliper with a hanger or bungee—don’t let it dangle by the brake hose.
How are the old pads removed from the caliper bracket?
Retract the caliper piston using a C-clamp or piston tool, then slide the outer pad out. Remove any retaining clips or spring hardware and pull the inner pad free. Note the pad orientation and hardware placement for reassembly.
Should I service the rotor and hub during a pad replacement?
Yes. Inspect the rotor for grooves, scoring, or runout. Light resurfacing may be acceptable, but replace rotors that are below thickness spec or heavily damaged. Clean the hub mating surface with a wire brush and brake cleaner to ensure proper rotor seating.
How do I prep the caliper piston and slider pins?
Remove slider pins, clean them with brake cleaner, and inspect for corrosion. Apply a high-temperature silicone grease to the pins before reinstalling. Clean the piston face and boot; if the piston is seized or the boot is damaged, replace the caliper or rebuild it.
Any tips for installing inner and outer pads correctly?
Fit the inner pad with any wear sensor or shim toward the caliper piston as originally oriented. Seat the outer pad into the caliper bracket, ensuring retaining clips and anti-rattle hardware are secure. Use new hardware if the kit provides it.
What torque values should I use when reassembling the brake and wheel?
Torque caliper bracket bolts and caliper guide bolts to the factory specs in your service manual. Tighten lug nuts in a star pattern to the wheel torque spec (commonly 80–100 ft·lb for many XC90s, but verify for your year). Use a calibrated torque wrench.
Is bedding-in new pads necessary for the Volvo XC90?
Yes. Perform a break-in procedure after installation: several gradual stops from moderate speed to heat-transfer the pad material evenly to the rotor. Avoid heavy braking for the first 100–200 miles and follow pad manufacturer recommendations.
When should I replace rear pads compared with front pads?
Front pads usually wear faster due to higher braking load, but check both axles. Replace rear pads if thickness falls below the minimum spec or if you hear squeal indicators. Changing both pads on an axle at the same time ensures balanced braking.
Can I reuse old hardware and clips, or should I install new parts?
Replace worn or corroded hardware and any damaged clips or shims. Many pad kits include new anti-rattle clips and pins. New hardware ensures proper pad fit and reduces noise and uneven wear.
What common problems indicate a faulty caliper after pad replacement?
Pulling to one side, uneven pad wear, a spongy brake pedal, or a stuck piston suggest caliper issues. Leaks at the piston seal or damaged slide boots also require caliper rebuild or replacement.
How long should the job take for a DIY mechanic familiar with brakes?
Expect about 1–2 hours per axle for an experienced DIYer. First-timers may need more time. Work carefully and don’t rush critical steps like torquing bolts and bedding pads.