Understanding your car’s diagnostics system gives drivers a real edge when maintaining engine performance and avoiding costly repairs.
The Volvo journey with onboard self-diagnostics began in 1988 with Bosch LH 2.4 systems on 700 series non-turbo models. By 1996, modern vehicles adopted an entirely different OBD-II setup that needs a computerized scanner and a special data connector.
Short checks of the coolant temperature sensor and the air temperature sensor help protect engine coolant temperature and fuel delivery. A quick code scan points to the offending sensor or control module, while manual steps and a reader can clear a trouble entry when repairs finish.
This introduction lays the groundwork for locating the diagnostic center, interpreting the fault list, and handling basic ignition, spark, and brake related items. Use the linked fault list for detailed references: Volvo fault code list.
Key Takeaways
- Volvo used Bosch LH 2.4 diagnostics from 1988; modern OBD-II arrived in 1996.
- Scanners access the data connector and reveal fault information fast.
- Check sensors like coolant and air temperature first for engine issues.
- Knowing the control systems and reader basics saves time and money.
- Clear trouble only after fixing the underlying component or sensor.
Understanding Volvo Diagnostic Systems
In 1988, Volvo introduced an early electronic engine management that could monitor fuel delivery and ignition timing using the Bosch LH 2.4 on 700-series non-turbo models.

The first control unit could detect a basic fault and store a simple code. That early setup watched the fuel and ignition cycles and flagged a failing sensor before damage spread.
Why this matters:
- The system gives an early warning when a sensor drifts out of range.
- Stored codes point technicians to the likely fault area.
- Monitoring fuel trim and ignition timing helps protect the engine.
Modern Volvo systems now link every module across the vehicle. Learning how the system reports a code and which sensor it targets makes troubleshooting faster and less costly. Use this foundation when you move on to scanning and interpretation.
How to read OBD2 codes in a Volvo?
A scan tool connected to the car’s data link gives instant access to stored fault entries.
Modern OBDII Scanning
Since 1996, Volvo models use the standardized OBD system. A small scanner plugs into the data link and can read codes and live sensor values. The scanner shows a list that points at likely problems, such as a failing oxygen sensor or a position sensor.
Use the scanner while the engine runs to monitor fuel and ignition behavior. That timing lets you spot intermittent faults before they worsen. Modern tools also talk to the control module so you can clear a stored code after repair.
The Role of Diagnostic Software
Diagnostic software interprets trouble codes and maps them to specific sensors. It helps pinpoint issues with the coolant temperature sensor or the air temperature sensor that affect engine coolant temperature and fuel delivery.
| Function | What the tool shows | Why it matters |
|---|---|---|
| Read stored code | Error number and brief text | Directs repair toward the faulty sensor or module |
| Live data stream | Sensor voltages and engine parameters | Confirms sensor operation and fuel/ignition timing |
| Clear memory | Resets stored faults after repair | Verifies the problem no longer appears |
- Locate the data link under the dash, usually near the driver.
- Scan at idle and under load for full coverage.
- Use software that decodes the list and suggests fixes.
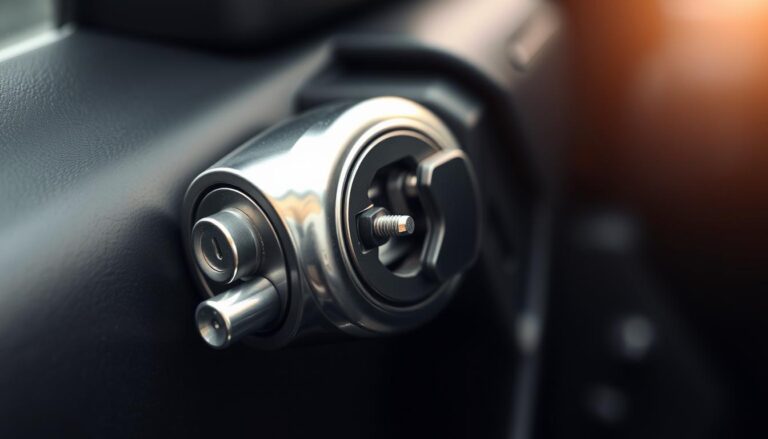
Identifying Your Volvo Diagnostic Port
Find the diagnostic port before you attach a scanner. It gives access to the vehicle data stream and is the starting point for any scan that reads a fault or live sensor value.
For later 1996+ models the connector moved from under the hood to the console, usually in front of the shifter. That change made it easier to plug into systems that monitor fuel and ignition. Locate the port and check its position before you begin.
Tip: a loose or corroded connector can block communication. A failed connection may stop the system from reporting a code and hide simple engine issues.
“Always confirm the connector pins are clean and seated; many failed reads trace to poor contact.”
| Item | Where to look | Why it matters |
|---|---|---|
| Connector position | Console, front of shifter (1996+) | Quick access to engine control and sensor data |
| Signal type | Electronic data link (OBD) | Transmits codes and live fuel/engine values |
| Common fault | Corrosion or loose pins | Prevents reading a code or live stream |
- Locate the port first.
- Inspect pins for corrosion.
- Secure connections before scanning.
Essential Tools for Modern Volvo Diagnostics
A quality diagnostic tool turns vague symptoms into clear repair targets for your Volvo. Investing in the right gear saves time and prevents needless parts replacement.
Choosing a Reliable Scanner
Pick a scanner (check price on Amazon) that reads both generic and manufacturer-specific faults. The AutoPhix ES610 is a practical choice; it reads and clears many Volvo code types and sells for about $85 on Amazon. That price point gives hobbyists and small shops broad coverage without breaking the bank.
Why it matters: a good unit shows live sensor values and captures fuel and ignition control data. This helps you spot a failing position sensor or a drifting temperature sensor before engine damage follows.
- Ensure the scanner can access engine control and transmission systems.
- Confirm it reads sensor voltages and clears stored code entries after repair.
- Choose tools that log live stream data for intermittent problems.
Regular diagnostics keep the vehicle running at peak performance and stop small faults from becoming major problems.

Manual Retrieval Methods for Older Models
Many classic models use a manual diagnostic box in the engine center. This box provides direct access to stored fault information when modern scanners are unavailable.
Locating the Diagnostic Box
Find the box near the engine center, often behind protective trim or near the fuse area. Inspect the connector and pins before attaching any lead.
Using the Test Cable
Insert the test cable into the correct socket and set the ignition key to position II. A simple test button will cycle diagnostic modes and flash a code or light sequence.
- Socket 1: Electronic transmission
- Socket 2: Fuel injection
- Socket 3: ABS / brake
- Socket 6: Ignition
- Socket 7: Instrument cluster
Understanding Diagnostic Test Modes
Modes let the driver trigger checks of sensors like the oxygen sensor, air temperature sensor, and coolant temperature sensor. The box reports fault numbers that map to system components and control modules.
Tip: Always consult the model-specific faq and instructions for exact socket mapping and interpretation. Correct socket choice saves time and prevents unnecessary repairs.
Interpreting Common Trouble Codes
Common fault numbers often tell a clear story about what the engine control unit detected. A P0420 entry normally points at catalyst efficiency below threshold and may indicate a failed oxygen sensor or exhaust problem.
P0300 signals random or multiple cylinder misfires. That fault can come from ignition or fuel delivery failures, worn spark components, or a bad position sensor.
P0171 shows the system is running too lean on bank 1. Check for vacuum leaks, a weak fuel pump, or a contaminated mass airflow input before replacing sensors.
P0442 flags a small EVAP leak. This often traces to a loose cap or cracked hose rather than the purge valve itself.
Use a concise code list and live data to confirm which sensor or control module is really at fault. That approach separates minor sensor swaps from major engine repairs.
| Code | Likely cause | Quick check |
|---|---|---|
| P0420 | Catalyst/oxygen sensor | Inspect exhaust, test sensor readings |
| P0300 | Ignition/fuel misfire | Scan for misfire counts, check plugs |
| P0171 | Lean condition | Check for vacuum leak, fuel pressure |
Tip: Analyze each code with live fuel and sensor data before ordering parts. That saves time and avoids unnecessary expense.
Clearing Diagnostic Memory
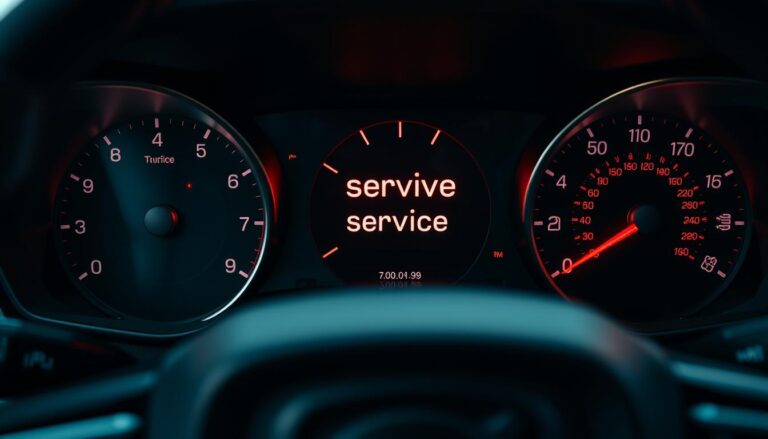
Erasing the memory after fixes confirms whether the repair truly fixed the problem.
Once you have retrieved the trouble codes and fixed the faulty sensor or part, clear the diagnostic memory to reset the system and extinguish the check engine light.
Standard method: press and hold the diagnostic button for more than five seconds. This erases stored entries from the engine control unit and resets learned parameters.
“Clear the memory only after repairs; leaving old entries can hide current faults.”
| Action | What it does | Why it matters |
|---|---|---|
| Hold diagnostic button >5s | Erases stored codes and resets ECU | Turns off the light and removes old fault data |
| Drive cycle after clear | Allows system to relearn fuel and ignition trims | Shows if the repair fixed the engine issue |
| Re-scan if light stays | Read codes and inspect sensors | Detects persistent faults in control or fuel systems |
- Confirm the repair before clearing; otherwise the code will return.
- Re-scan after reset to read codes and ensure no new faults appear.
- Repeat checks of fuel delivery, ignition, and sensors if the light remains on.
Troubleshooting Common Reading Failures
Many failed reads trace back to simple contact problems rather than complex engine faults. Start with a visual check of the diagnostic connector and the wiring harness before running the scanner.
Addressing Corrosion and Connection Issues
Inspect the pins for corrosion, bent contacts, or packed dirt. Chris Herbst notes corrosion is a frequent cause of no communication between the reader and the control unit.
Quick checks:
- Confirm the key is in the correct position so the ECU can send data.
- Look at the diagnostic box LED; if it is dark, check the bulb first — Chris Mullet’s tip.
- Clean corroded pins carefully. Doug Bennett recommends a Dremel with a fine bit for stubborn deposits.
“A faulty connection often creates an incorrect code and hides the real fault.”
Why this matters: dirty contacts can corrupt live data from the oxygen sensor, coolant temperature sensor, or air temperature sensor. Fixing the connector often restores accurate scans and protects engine performance.
Conclusion
Knowing what the scanner reports helps you act quickly and wisely when trouble arises.
Master the basics and you can spot most problems before they worsen. Regular checks of live information and stored entries give clear direction for repairs.
Whether you use a modern Obd tool or the manual diagnostics in older models, the data helps you target faults. Pay prompt attention to an oxygen sensor fault and other critical parts to keep your vehicle safe.
Taking control of trouble codes reduces dealer visits and saves money. Use this guide as a practical map so your car stays reliable and serviceable with professional confidence.
FAQ
What diagnostic port do Volvo models use?
Most modern Volvos use the standard 16-pin OBD-II connector located under the dash near the driver’s seat. Older models may have a separate diagnostic box or smaller test connector located in the kick panel or glove compartment. Check the owner’s manual or service guide for the exact location.
Which scanner works best for Volvo vehicles?
Choose a scanner that supports CAN, ISO9141, and Volvo-specific protocols. Professional-grade tools like Autel, Launch, and VCDS-compatible interfaces or Volvo VIDA software provide live data, module coding, and advanced functions beyond basic code reading.
Can I get live oxygen sensor data with a basic reader?
Basic readers often show stored trouble codes but may lack live-stream capability. For oxygen sensor voltage, fuel trims, and closed-loop status, use a scanner that displays PID live data or an app that supports real-time monitoring via an OBD-II Bluetooth or Wi-Fi adapter.
How do I clear fault memory after repairs?
Most scanners include a “clear codes” function that erases stored faults and turns off the malfunction indicator lamp if the issue is resolved. Clearing without fixing the root cause can cause the light to return and may erase freeze-frame data useful for diagnosis.
What if the scanner shows no connection or “no response”?
Check the connector for bent pins, corrosion, and secure wiring. Verify vehicle battery voltage and ignition position—many modules require the ignition in ON. If problems persist, test continuity to fused power and ground at the port or inspect the diagnostic box on older models.
Are trouble codes the final word on repairs?
Trouble codes point to a system or sensor that detected a fault, not always the failed component. Use live data, visual inspections, and targeted tests—spark, fuel pressure, sensor voltages, and grounding—to confirm the root cause before replacing parts.
How can I access diagnostics on very old Volvo models without OBD-II?
Older Volvos may use a diagnostic box and a test cable that flashes the dash cluster or sends blink codes. Locate the diagnostic plug, follow the model-specific jumper procedure, and decode the blink or light sequences using the factory service manual.
Will clearing codes fix a check engine light caused by intermittent faults?
Clearing codes can temporarily extinguish the light, but intermittent faults often return. Monitor the vehicle under varied driving conditions after clearing and capture live data or freeze-frame information to catch fleeting issues.
How important is software for Volvo module programming and advanced functions?
Software like Volvo VIDA or dedicated dealer-level suites enables module programming, key coding, and service resets. For routine diagnostics and live data, many third-party apps work well, but programming tasks typically require manufacturer-level tools and credentials.
What sensors commonly trigger fault codes on Volvos?
Frequent culprits include oxygen sensors, mass airflow sensors, camshaft and crankshaft position sensors, coolant temperature sensors, and throttle/pedal position sensors. Fuel-system issues and ignition faults also generate common codes.
Can I diagnose intermittent misfires with an OBD scanner?
Yes. A scanner that logs cylinder-specific misfire counters, fuel trims, and ignition timing helps isolate misfires. Combine that data with compression and fuel pressure tests to determine whether the issue is mechanical, fueling, or ignition-related.
What precautions should I take when connecting a scanner?
Ensure the ignition is in the correct position per scanner instructions, avoid connecting while charging the battery, and use a quality adapter to prevent voltage spikes. Follow safety guidelines and disconnect the tool before performing repairs on live circuits.
How do I interpret P0xxx versus P2xxx codes on Volvos?
P0xxx codes follow SAE standards and indicate generic powertrain issues, while P2xxx codes may be manufacturer-specific for Volvos. Use a current code database or Volvo service documentation to get accurate definitions and repair tips for P2xxx entries.
Is professional diagnostic help necessary for fault codes related to engine control modules?
Complex faults, intermittent communication errors, or module programming needs often require professional tools and expertise. If codes persist after basic checks, consult a Volvo specialist or dealership for advanced diagnostics and module reprogramming.
Where can I find reliable code definitions and repair procedures?
Use official Volvo VIDA documentation, reputable repair guides like Haynes or Chilton, and trusted online databases such as ALLDATA or manufacturer resources. Cross-reference code definitions with live data and service bulletins for accurate diagnosis.