This short guide explains why and how to perform a simple reset so your car charges correctly and warning messages stay clear. You will learn the safe steps technicians use to protect every system and module during a swap.
The difference between a basic disconnect and modern BMS steps matters on newer year cars. Choosing the right approach reduces guesswork and avoids needless forum searches and mixed posts.
We outline a professional sequence: safe disconnect, residual discharge, reconnect in the correct ignition position, and a final verification for system health. Expect to see a few dash symbols or lights at startup and know what each typically means.
Practical tips below help you avoid common questions, protect modules, and minimize come-backs so the replacement delivers full benefit.
Key Takeaways
- Follow a safe disconnect and reconnection sequence to protect electronics.
- Know when a quick reset suffices and when BMS action is needed.
- Expect some dash messages or lights on first startup; most are normal.
- Use ignition position guidance to avoid module damage.
- Apply technician-vetted steps to reduce follow-up visits and errors.
What You Need to Know Before You Reset a Volvo Battery
Before you touch terminals, know which model year and control systems need special handling. Identifying the platform and confirming ignition guidance reduces risk to the car’s electronics and engine modules.
User intent and why the reset matters today
The main intent is simple: protect the electrical system and keep starting performance reliable after a new battery install. Technicians aim to avoid nuisance lights, shortened battery life, and module wear.
Model years and systems affected
Older platforms such as s40 v50 and P2 cars (2001–2007) follow VIDA guidance: disconnect the negative post, press the brake for about ten seconds to discharge residual power, then reconnect with ignition in Position II.
Late-model cars like the 2018 XC40 and 2020 v60 often need a scan-tool service so the control module recognizes the main battery and applies proper charge strategy. Use the CEM “Battery reset to zero service”, maintain stable power, and clear fault codes after running the reset procedure.
- Turn off fog, rear fog light, hazard lights, and accessories before disconnecting.
- Document the steps performed for future posts or shop search records.
How to Reset Volvo After Battery Replacement
Begin with a concise checklist to protect electronics and avoid surprises.
Preparation and safety
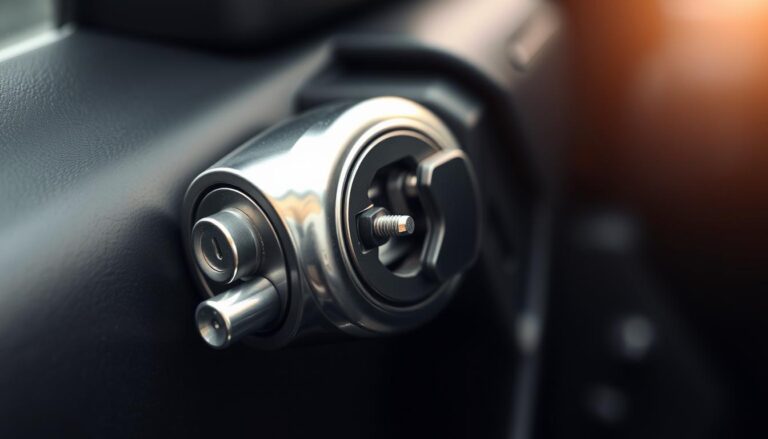
Turn off all lights and accessories. Confirm you are working on the main battery and that the new battery matches OE specs. Open hood or trunk fully and keep the key out of the ignition.

Safe disconnect and residual discharge
Loosen and remove the negative post first to isolate the system. Never let tools bridge the positive post to chassis.
With one post off, press and hold the brake pedal for about 10 minutes to bleed residual charge from capacitors. This simple button action helps protect modules.
Reconnection and initial checks
Fit the positive clamp first, then the negative. Before final tightening, set the ignition to Position II so modules wake up to a stable voltage.
Check clock, one-touch windows, radio, and exterior lights including fog light, rear fog light, and hazard lights.
Interpreting outcomes
If everything seems fine, the procedure likely worked. Persistent low battery messages or a battery symbol means check terminal torque, grounds, and plan a system service on newer cars.
| Step | Action | Expected result |
|---|---|---|
| Preparation | Turn off lights, verify main battery, open hood | Safe environment, reduced risk to modules |
| Disconnect | Negative post first; avoid shorts | System isolated |
| Discharge | Hold brake for ~10 seconds | Capacitors drained |
| Reconnect | Positive then negative; ignition II before tighten | Modules wake with stable power |
| Verify | Check lights, clock, windows | Normal operation or follow-up service |
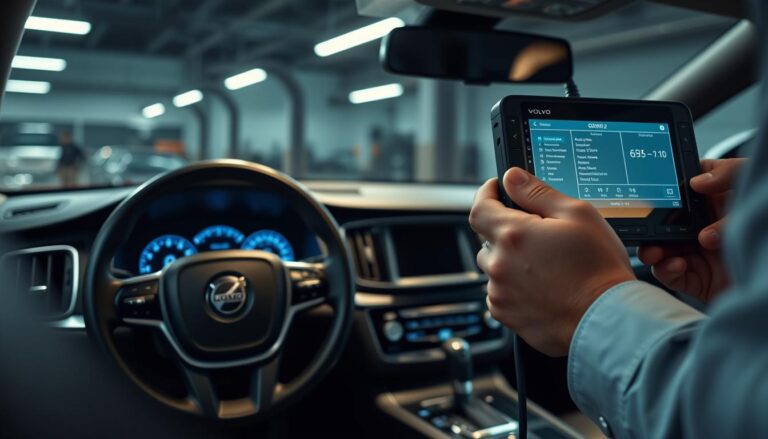
Performing a BMS Reset on Late-Model Volvos
Late-model cars require a targeted service routine to set the management system for proper charge control. This step tells the control module the new battery state so alternator output and charge strategy match the pack.

Why a BMS reset is needed for proper charge control
Without a BMS update, the vehicle may estimate state-of-charge incorrectly and log a low battery message or show a battery symbol. Modern systems use the BMS to protect the engine start and accessories.
Scan-tool steps: Service Function & CEM routine
- Keep a stable power supply connected to the vehicle.
- Launch diagnostic software and choose European → Volvo.
- Auto-identify the model and year, then open Quick Service → CEM → Battery reset to zero service.
- Follow on-screen prompts, press the indicated button to start, and allow a few minutes for the tool to update BMS counters.
Troubleshooting after the reset
After completion, read and clear any fault codes. If a persistent low battery message or warning stays, confirm registration finished, check sensor and negative terminal connections, and verify charge voltage with the engine running.
“Keep a stable power source connected; voltage dips during programming can corrupt data and trigger dash lights.”
| Action | What to do | Expected result |
|---|---|---|
| Power | Connect stable supply before service | Prevents voltage dips during programming |
| Software | European → Volvo → Auto ID → Quick Service → CEM | Correct model and year read automatically |
| Service | Start “Battery reset to zero service” | BMS counters updated; charge targets set |
| Verify | Clear DTCs and confirm charging voltage | Normal charge, no persistent messages |
Conclusion
Tailor final steps to the vehicle so modules and charge strategy align. Older year platforms often do well with a careful disconnect, residual discharge, and reconnect sequence. Newer cars need a formal bms reset to set correct charge targets and prevent recurring low battery messages.
Verify function with a short road test and a quick scan. Check lights, hazard lights, rear fog light, and related systems. If any message or unfamiliar symbol remains, scan and clear codes, then retest to confirm the system and engine behave normally.
Document the process for S40 V50, P2, and late-model cars. A concise checklist saves minutes on search and reduces questions and posts—thanks to a standard approach, technicians deliver consistent results and fewer comebacks.
FAQ
What should I check before performing a battery reset on my Volvo?
Before you begin, make sure the vehicle is on level ground, the ignition is off, and you have eye and hand protection. Verify the replacement battery matches the original specifications and is fully charged. Protect sensitive modules by avoiding metal contact with terminals and disconnect the negative first. Have basic tools and, if available, the owner’s manual or a diagnostic tool on hand.
Why does a battery-related reset matter for modern Volvo models?
Many late-model Volvos use a Battery Management System (BMS) that monitors state-of-charge and health. Resetting the system after replacing the main battery lets the car relearn the new battery’s parameters, ensures correct charging behavior, and prevents false low-battery warnings or charging interruptions.
Which models and years commonly require a BMS or system reset?
Models from the S40 and V50 era up through recent XC40 and 2020 V60 vehicles use electronics that can need a reset after service. Newer XC60 and XC90 vehicles also use BMS or related control modules, so check the service procedures for your specific year and trim.
How do I safely disconnect the main battery to avoid damage?
Turn off the ignition and remove the key. Disconnect the negative terminal first to reduce short risk, then the positive. If your car has a battery cut-off switch or service fuse, use that. Allow residual charge to bleed off for several minutes before touching other systems or unplugging sensitive modules.
What’s the correct reconnection procedure after installing a new battery?
Connect the positive terminal first, then the negative. Tighten terminals securely but avoid over-torquing. With the new battery installed, turn the ignition to Position II (accessory on without starting the engine) for a minute to let modules initialize. Check dash lights, rear fog and hazard lamps, and infotainment for error messages.
My dash shows a battery symbol or a “low battery” message after replacement. What does that mean?
A battery symbol or low-battery message can indicate the BMS hasn’t learned the new battery, the charge state is low, or a charging circuit fault exists. Start by verifying the battery is fully charged and connections are clean. If messages persist, perform a BMS service reset or run a diagnostic scan to find charging faults.
How do I perform a BMS reset using a scan tool on late-model cars?
Using a compatible diagnostic tool, navigate to service functions, select the Central Electronic Module (CEM) or Battery Management section, and choose the procedure such as “Battery reset to zero service” or similar. Follow on-screen prompts; the tool will record the new battery parameters and clear related service counters.
Are there manual reset options if I don’t have a scan tool?
Some older models allow a basic relearn by cycling the ignition, letting the vehicle sit, or using a battery disconnect for a set time. However, many modern Volvos require a scan-tool service reset to fully clear BMS entries. Consult the owner’s manual or a dealer for model-specific manual steps.
After a BMS reset, why might I still see fault codes or warning lights?
Persistent faults can come from charging system issues (alternator, wiring, fuses), incorrect battery type, weak battery charge, or unrelated module faults triggered during the disconnect. Run a full diagnostic, clear stored codes, then re-check while monitoring live data such as charging voltage and alternator output.
Should I check exterior lights like rear fog and hazard lamps after battery work?
Yes. Verify that rear fog lights, hazard lights, and brake lights function correctly after reconnection. These checks confirm the body control module and lighting circuits are operating and help reveal any wiring or module issues caused during service.
How long does the BMS relearn process typically take?
Learning can begin immediately but may require driving cycles and normal charge/discharge patterns to complete. Basic initialization often occurs within minutes of ignition cycles, but full adaptation can take several trips or up to a few days of normal use for accurate state-of-charge estimates.
Can a weak alternator or wiring fault mimic a bad battery after replacement?
Yes. A failing alternator, loose connections, corroded terminals, or blown fuses can produce low-voltage symptoms similar to a failing battery. If the new battery discharges quickly or messages persist, inspect charging components and test alternator output at idle and under load.
Do Volvo dealers charge for a BMS reset, and is it necessary to use them?
Dealers and independent shops with Volvo-compatible scan tools can perform the service. Some charge for the diagnostic time. If you have access to a proper tool and know the procedure, you can do it yourself. For complex faults or warranty work, dealer service ensures correct coding and records.