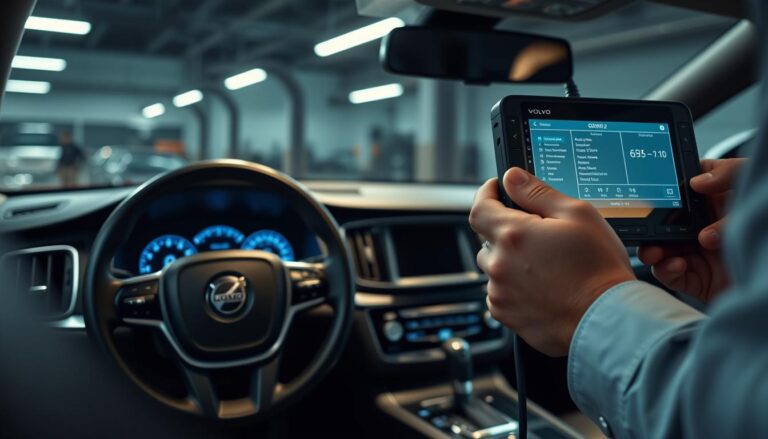
This short guide explains what a modern Volvo key fob battery replacement involves and why it’s a common, simple maintenance task for many U.S. drivers.
The steps here focus on buttoned remote designs found on most 2016–present models. These units usually accept a 3V CR2032 cell and can be serviced on a clean work surface in minutes with basic tools.
Note: Compact, buttonless key tags are sealed for water and dust resistance and are not meant for user service. Avoid forcing plastic tabs and do not touch contact surfaces while handling the small electronic parts.
This guide sets expectations for time and difficulty, lists tools and supplies, walks through opening and hatch rotation from “close” toward “open,” shows correct orientation with “+” up, and covers checks for reassembly. If the remote still won’t respond after a change, programming by a certified service center may be required.
Key Takeaways
- Most modern buttoned Volvo remotes use a 3V CR2032 and are simple DIY jobs.
- Work on a clean surface and avoid touching electronic contacts.
- Expect a quick task if you have the right supplies and steady hands.
- Buttonless key tags are sealed and not user-serviceable.
- If the unit stays unresponsive, a dealer can assist with programming.
Volvo key fob battery replacement overview for modern Volvo models
Recent model years favor a consistent buttoned remote layout, so many owners find a single set of steps works across multiple trims. In this guide, “modern volvo” refers to cars from about 2016 to the present.
Which vehicles this fits:
- Common U.S. crossovers and sedans—XC60, XC90, S60, V60—often use the standard buttoned design.
- Main and spare remotes that have visible buttons and an inner hatch labeled “open/close” are usually serviceable.
When this won’t apply: Rugged, buttonless key tags are sealed for water and dust resistance. Those units are not meant for a regular battery change and may require ordering and pairing a replacement unit.
Quick visual check: if your device has no buttons and feels like a solid tag, do not pry it open. If it shows buttons and a small release near the key ring, the DIY steps that follow will likely apply.
Expect small differences across models — for example, whether a logo cover or plain panel comes off first — but the overall process stays the same. Next, gather tools and supplies and follow careful opening steps to avoid broken tabs or clips. For additional troubleshooting, see volvo key fob troubleshooting.
Tools and supplies to replace a Volvo key battery safely
Gathering the right tools before you start makes this small service task quick and safe.

What to gather before you start
Checklist:
- Confirmed-correct 3V CR2032 cell (check the owner manual)
- Coin or small flathead screwdriver
- Well-fitting rubber gloves
- Stable, low-static work surface (example: a wood cutting board)

Why each item matters
Confirming the cell type in the owner manual avoids fit and reliability issues. Using the wrong cell can cause poor contact or shorter life.
Choose a high-quality replacement for better range and fewer repeat changes. Quality matters in cold or hot climates.
A low-static surface reduces the chance of damaging electronics. A wood board or other non-synthetic place is a simple, effective option.
Wear gloves to keep contacts clean and to grip small parts without slipping. Good lighting and a comfortable position help you spot small tabs and hatch markings.
| Item | Reason | Tip |
|---|---|---|
| 3V CR2032 | Correct fit and voltage | Confirm in owner manual |
| Flathead screwdriver / coin | Safe pry tool for hatches | Use a small screwdriver if screws are visible |
| Rubber gloves | Prevent contamination | Thin, snug gloves work best |
| Low-static surface | Reduce static risk | Wood board is a reliable choice |
Final note: Once tools are ready, this becomes a simple sequence of controlled steps rather than trial-and-error. A clear workspace, the right screwdriver, and a fresh new battery make the job straightforward.
How to replace the Volvo key fob battery?
Follow these quick, safe steps for a straightforward power cell swap.
Start position: Place the emblem side up on a clean, nonstatic surface. Find the small release near the key-ring loop and slide it toward the ring until the first cover loosens.
Lift the outer cover gently
Use a fingernail or a thin coin to lift the cover. Work slowly and repeat gently if it resists; do not force tabs or bend clips.
Expose the inner panel and hatch
Slide the revealed inner button sideways to remove the second cover. Flip the unit if needed; some models reverse cover order.
Open the circular hatch
Rotate the round hatch from “close” toward “open” with a coin or small screwdriver. Pry the hatch off carefully without gouging the case.
Swap the cell safely
Put on gloves and lift the old cell from the side nearest the ring. Avoid touching contact surfaces. Install a new 3V CR2032 with the “+” side up, sliding it under the far clips until they lock.
Reassemble and test
Rotate the hatch back to “close,” align covers, press evenly, and slide them toward the ring until each snap is flush. Confirm lock/unlock and start functions before finishing.
Choosing the right replacement battery for your Volvo key fob
Confirming the correct cell prevents fit and performance problems.
Start by checking the stamp on the installed cell and your owner’s manual maintenance notes. That printed code shows the exact spec used by your model and reduces guesswork.
Most modern buttoned remotes accept a high-quality 3V CR2032. Use a reputable brand to keep range and responsiveness steady. A weak or counterfeit cell may fit but give short life or inconsistent voltage.
Buying tips and long-term value
- Verify the code in the owner manual and on the old cell before disposal.
- Purchase from trusted retailers and check packaging date and seals.
- A slightly better cell reduces repeat changes and lowers the chance of a weak signal when you need the car.
| Specification | Why it matters | Action |
|---|---|---|
| 3V CR2032 (on Amazon) | Standard fit for many models | Confirm in owner manual |
| Brand quality | Stable voltage, longer life | Choose established makers |
| Packaging date | Fresh stock lasts longer | Avoid old or damaged packs |
Signs your Volvo car key battery is low
Small signs often signal a weakening remote cell before it fails entirely.
Earliest clues
The vehicle may respond more slowly after a press. You might wait a beat longer than usual before locks click or lights flash.
Delayed response, reduced range, repeated presses
Reduced range shows up when you must stand much closer for commands to work. Places where it used to respond at distance now require proximity.
Repeated button presses are common. Even within normal range, you may need several attempts before the car acts.
Dashboard warning: “Key fob battery low”
Many models display a clear dashboard message that prompts a proactive swap. This warning often appears before full failure and can prevent getting stranded.
These symptoms can start intermittently. That means the unit works sometimes and fails at others.
Practical outcomes: difficulty unlocking, multiple attempts needed, and occasional problems when you try to start engine or use start/stop features.
| Symptom | What you notice | Short-term risk | Action |
|---|---|---|---|
| Delayed response | Longer wait after pressing | Frustration, missed unlocks | Check battery soon |
| Reduced range | Must stand closer | Inconvenience in lots | Plan replacement |
| Dashboard warning | “Key fob battery low” message | Near-failure | Replace promptly |
What to do when a Volvo key fob battery is dead
If your remote shows no response, the immediate priority is safe entry without harming trim or the case.
Unlock with the manual key under the door handle
Open the fob and pull out the flip key. Many models have a hidden cylinder under a small cover on the driver’s door handle. Slide the cover and use the metal key to unlock. Work gently to avoid scratching the finish or breaking plastic tabs.
Use the Volvo Cars App for remote access
If your vehicle has connected services and an active subscription, the app can unlock doors and start the car remotely. This is a safe, contactless option when the portable device is dead and you cannot reach a spare.
Last-resort: hold the fob close while pressing start/stop
When there is a faint charge, pressing the portable unit right up against the start/stop button while you press may let the system read the transponder and start the engine. This is temporary and may not work for every model.
Practical cautions: If stranded, move to a safe location first. Keep a spare cell and a spare metal key when traveling. These fixes are short-term — a proper cell swap restores normal operation.
| Situation | Immediate action | Why it helps |
|---|---|---|
| battery dead and locked out | Use flip key in hidden cylinder | Avoids forcing trim and gives safe entry |
| Connected service active | Unlock/start from smartphone app | Remote access without a working fob |
| Faint charge remains | Hold fob near start button while pressing | Receiver may read transponder and start engine |
After the battery change: testing, troubleshooting, and programming
After reassembly, run a short verification routine to confirm normal remote functions and engine start behavior.
Quick post-replacement checks
- Press lock and unlock and watch for door and light response.
- Stand by the driver door and confirm the vehicle recognizes the unit before opening.
- Sit in the driver seat and confirm normal start behavior by attempting to start engine.
- Covers must sit flush and clips should feel secure.
- Verify the circular hatch arrow is turned back to “close.”
- Shake gently; no rattling should indicate a loose cell or misaligned clip.
Troubleshoot common DIY issues
If the unit stays unresponsive, check for an upside-down cell, a cell not fully captured by clips, or a hatch not seated. Misaligned covers can stop contacts from meeting. Try reseating the cell and snapping covers evenly.
Intermittent range problems and when programming is required
If range remains poor after reseating, try a different, high-quality replacement and confirm clip fit. When a correct installation still leaves the remote unresponsive, the vehicle may need re-pairing.
When to seek professional help
- Housing tabs are broken or clips won’t engage.
- Hatch mechanism is stripped and won’t rotate.
- Signs of water damage or corrosion are present.
If re-pairing is needed, a certified Volvo service center can program and validate the unit for your models. This short guide helps most owners finish a successful battery replacement. If problems persist, seek dealer assistance.
Tips to extend key fob battery life and avoid repeat replacements
A few simple changes in storage and handling cut down on unnecessary drain. These small habits help keep range steady and reduce surprise failures.
Storage and handling habits that reduce drain
Keep it in one safe place. Use a dedicated pocket or small case instead of tossing the unit loose in a bag. This prevents accidental button presses and reduces wear.
Mind temperature extremes. Prolonged heat on a dashboard or deep cold in storage shortens cell life and lowers reliability. Store the device inside the car cabin when possible.
- Handle gently—drops can loosen clips and cause intermittent contact that mimics a weak cell.
- When low signs appear (delays or reduced range), replace early to avoid a dead situation.
- Choose quality cells and avoid touching contact surfaces during installation.
| Action | Why it helps | Quick tip |
|---|---|---|
| Dedicated pocket or case | Prevents accidental presses | Keep near other car items |
| Avoid extreme heat/cold | Preserves voltage and life | Don’t leave on dash |
| Gentle handling and clean surface work | Prevents clip damage and contact issues | Use a wood surface when servicing |
Final note: Regular care and good parts cut down on visits for service and keep your vehicle access reliable.
FAQ
What models fit this DIY battery swap?
Most modern Volvo models with a removable fob shell—including XC90, XC60, S60, V60 and similar key designs—use a CR2032 3V cell and follow this simple procedure. Check the owner’s manual for your exact model to confirm compatibility.
Which Volvo key design won’t work with these steps?
If your vehicle uses a buttonless key tag or an integrated proximity module without a removable shell, these instructions won’t apply. Those units require dealer service or specific tools for service.
What tools and supplies should I gather first?
Prepare a fresh CR2032 3V battery, a small flathead screwdriver or a coin, and gloves to avoid oils on contacts. Work on a clean, flat surface with good light to prevent losing parts and reduce static risk.
How do I position the fob and find the release?
Hold the fob with the buttons facing down and the key-ring loop toward you. Locate the small release tab near the loop; that’s where you’ll insert a coin or flathead to open the first cover.
How do I remove the first cover without breaking tabs?
Insert a coin or flathead into the release slot and twist gently. Apply steady, even pressure and stop when the shell lifts. Avoid forcing it; if it resists, check for a hidden clip or use a slightly different angle.
What comes after removing the outer shell?
Slide the inner button insert out carefully to expose the battery hatch. Work slowly so plastic clips don’t bend. Keep parts in order to make reassembly straightforward.
How do I open the battery hatch safely?
Align the hatch arrow from “close” toward “open.” Use a coin or small screwdriver in the slot and twist gently to pry the hatch open. Keep tools controlled to avoid scratching or cracking the plastic.
How should I remove the old cell without damaging contacts?
Use your fingertip or non-metal tweezers; avoid touching contact surfaces with bare hands or metal tools. Lift the cell straight out to prevent bending retention clips.
How do I install the new 3V cell correctly?
Place the new CR2032 with the “+” side facing up, matching the marking in the battery well. Press it into place until clips click. Reclose the hatch and slide the inner insert back, ensuring clips align.
What checks should I run after reassembly?
Test lock/unlock buttons at short range and from a distance. Try starting the engine with the fob present. If functions are intermittent, reseat the cell and verify contact cleanliness.
When might a fob need dealer programming after a battery swap?
Rarely, modern fobs retain pairing. If your vehicle won’t recognize the fob after a fresh battery—especially after water damage or a broken transmitter—visit a certified Volvo service center for diagnostics and reprogramming.
What signs indicate a low cell before it dies?
Expect delayed responses, reduced operating range, repeated presses, and a dashboard message like “Key fob battery low.” Replace the cell promptly to avoid being locked out or unable to start the vehicle.
What are emergency options if the fob dies completely?
Use the manual key blade hidden in the fob to unlock the driver door under the handle. The Volvo Cars App can also unlock and start compatible vehicles. As a last resort, hold the fob close to the start/stop button while pressing it to start certain models.
Which battery should I buy for the best reliability?
Choose a reputable brand CR2032 3V cell for consistent voltage and longer life. Higher-quality cells deliver better range and fewer unexpected failures than cheap, off-brand options.
How can I extend fob cell life and avoid frequent swaps?
Store the fob away from heat and moisture, avoid excessive button presses, and remove it from metal keyrings that can short contacts. Keep the fob in a soft pocket rather than a crowded bag to prevent accidental activation.