Excessive oil loss signals a clear problem that needs prompt attention. This brief guide narrows the likely causes so you can act fast. We focus on two common paths: an external leak or oil burning inside the engine.
Oil protects moving parts from heat and friction. Low levels raise friction, increase temperatures, and can turn a minor wear item into a major engine failure. Check levels often and note rapid drops between checks.
Some consumption is normal with age, but a quick drop or warning light means stop driving and confirm the level. The diagnostic flow below starts with basics, then checks for visible leaks, PCV/intake pathways, and internal wear or seals that need repair.
This article targets U.S. owners who want practical, safe checks at home and clear signs when a qualified mechanic should take over. Follow the steps to narrow the issue and protect your vehicle.
Key Takeaways
- Rapid oil loss can indicate a leak or burning inside the engine.
- Low oil raises friction and heat, risking serious damage.
- Some consumption is normal; big drops are not.
- Start with level checks, then inspect for external leaks and PCV issues.
- Reduce driving if the warning light is on; confirm oil before continuing.
- Seek a mechanic for internal problems or uncertain findings.
Why is my Volvo losing oil? Start with oil level basics and what “normal” looks like
Recognizing normal oil use helps separate routine top-offs from urgent repairs. Typical consumption can range from about 1 liter per 1,000–3,000 miles. Manufacturer guidance flags losing more than a quart every 1,500 miles as a likely problem.
Low oil quickly harms engine performance. Reduced lubrication raises friction, which increases heat and the risk of overheating. Driving under load or long highway runs make these effects worse.
How to check oil correctly with the dipstick
Park on level ground and let the engine cool for a few minutes. Pull the dipstick, wipe it clean, reinsert fully, then read the level against the markings.
Add small amounts of the correct engine oil and recheck after each pour. Use the manufacturer-specified viscosity to avoid increased consumption.
Track oil loss over time
Document the amount added and the odometer reading each time. Track miles between top-offs to spot trends: a slow, steady decline suggests a seep, while sharp drops point to a leak or burning.
- Check oil levels about every 1,000 miles or more often if you see loss.
- Always confirm the level before long trips or heavy driving.
Quick symptom check: signs your Volvo has oil leaks vs oil burning
Start with a short survey of sights and smells. Note wet spots under the vehicle, blue-tinted exhaust, or any cabin burning scent. These clues help separate an external leak from oil entering the combustion chamber.

External leak clues
Look around the valve cover perimeter and the oil pan area for fresh wetness. Scan the undercarriage and splash shields; slow leaks may not drip onto the ground.
Internal burning clues
Blue smoke from the tailpipe or a persistent burning smell while driving often means engine lubricant reached the cylinders. Note when smoke appears—startup, acceleration, or long highway time—to narrow the source.
Warning lights and urgency
Any warning light for low level or pressure needs immediate attention. Ignoring it increases wear and heat, which can cause severe damage fast.
- Do you see wet spots outside? Inspect seals and gaskets.
- Do you smell or see smoke? Consider internal wear or valve issues.
- Only a warning light and dropping dipstick? Stop driving and test pressure.
| Sign | Likely cause | Next step |
|---|---|---|
| Wet undercarriage | External leaks (valve cover, pan) | Visual check, clean then recheck |
| Blue exhaust smoke | Oil in combustion | Document timing, shop test |
| Burning smell | Hot component contact | Inspect shields, hoses |
| Warning light | Low pressure or level | Stop driving, check dipstick |
If signs are unclear, ask a shop for an oil consumption test over a set distance. That confirms whether the problem is burning or leaking and guides repairs.
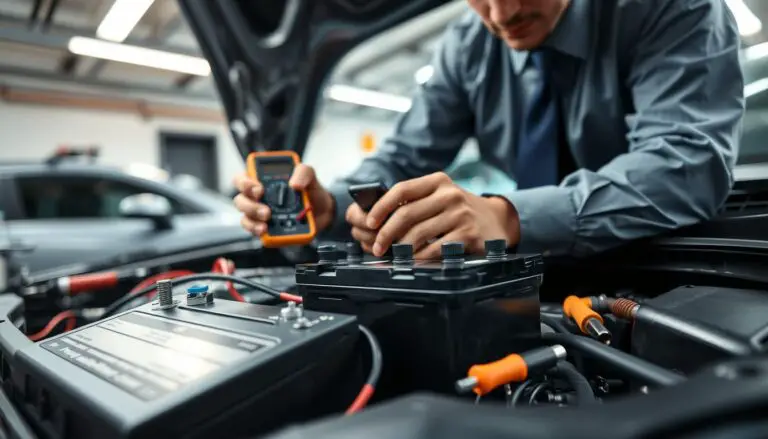
Common external oil leaks on Volvos and how shops confirm the source
A loose filter or a mis-seated gasket can produce sudden, dramatic fluid loss right after service. Check the filter and drain plug first. These faults create fast loss and are simple to spot.
Typical external points include the valve cover, camshaft seal areas, and the oil pan. Fresh wet dark fluid shows an active leak. Baked-on residue points to a slow seep that worsened over time.
- After service: loose filter, poorly tightened drain plug, or mis-seated gasket cause rapid loss.
- Aging seals: heat and cycles harden seals and lead to seepage at pan, head, and cam areas.
- Hidden leaks: fluid can spread across shields and underbody components, masking the source.
A competent mechanic starts with a visual check, cleans suspect spots, then runs the engine briefly and reinspects. For tough cases, shops add a UV-reactive dye to the system. Under UV light the dye traces the leak path and reveals the exact component.
| Leak location | Appearance | Typical action |
|---|---|---|
| Filter / drain | Fresh dripping | Tighten or replace |
| Valve cover / head | Wet edge, oil pooled | Replace gasket |
| Cam seals / pan | Seepage, baked residue | Seal or pan repair |
Prioritize repairs that cause rapid loss or drop onto hot exhaust parts. Those pose fire and smoke risk and need prompt attention to protect the engine and passengers.
When there’s no obvious leak: oil entering the intake system and PCV problems
If external leaks aren’t visible but levels keep dropping, inspect the PCV and intake paths. The PCV system vents crankcase gases back into the combustion stream. When it fails, pressure and vapors can drag oil into the intake and then into the cylinders.
How the PCV system controls crankcase pressure
The PCV valve and hoses manage blow-by gas flow so the engine breathes correctly. Restricted flow raises crankcase pressure and forces fluid past seals or into the intake tract.
Common symptoms pointing to a PCV fault
- Whistling or unusual suction noises — indicates vacuum problems in the ventilation system.
- Dipstick popping up — excess crankcase pressure can push the dipstick out.
- New valve cover leaks — pressure finds weak seals and creates fresh seepage.
Recognizing oil in the intake and air path
Look for an oily film inside intake hoses, residue in the airbox, or wet spots in the filtration area. That oil can be consumed during combustion without leaving visible puddles beneath the car.
Maintenance matters: poor oil quality and long service intervals allow sludge to form. Sludge clogs PCV passages, worsens pressure issues, and increases oil use.
| Check | What it shows | Shop test |
|---|---|---|
| Airbox/hoses | Oily film or pooling | Inspect and clean; pressure test intake |
| PCV valve | Clogged, noisy, or stuck | Replace and measure vacuum/pressure |
| Dipstick action | Popping or resistance | Crankcase pressure measurement |
If oil loss occurs with minimal external evidence, prioritize PCV and intake checks before assuming internal engine damage. For deeper diagnostic steps, consult a specialist or review a detailed case at Volvo D12 engine problems.
Internal engine issues that cause oil burn in the combustion chamber
Wear inside the engine often forces oil past rings and valves, where it is consumed during combustion. This internal burning is more serious than a simple leak because it can damage the catalytic converter and shorten engine life.
Worn piston rings and cylinder walls
Worn piston rings and worn cylinder walls reduce sealing. Oil slips past the rings into the combustion chamber and burns with fuel.
Expect reduced compression, lower performance, and noticeable consumption over relatively few miles.
Valve stem seals and valve stem wear
Bad valve stem seals let oil drip into the chamber, often showing as blue smoke at startup after the car sits.
Stem seals harden with heat and time, producing steady oil usage as the engine runs.
Head gasket problems
A failed head gasket can let coolant mix with oil. That dilutes lubrication, lowers oil quality, and raises overheating risk.
This scenario needs quick repair to avoid widespread internal damage.
Turbocharged engines and turbo seal wear
Turbo seal wear pushes oil into intake or exhaust paths. Check for oily intercooler piping and changes in boost or performance.
When turbo seals fail, consumption can rise even with no visible undercarriage leaks.
Oil quality, viscosity, and driving conditions
Using the wrong oil grade or low-quality product raises consumption and stress under heat load. Follow manufacturer specs.
Sustained high RPM, towing, and long uphill driving increase temperature and pressure, which accelerates internal wear and highlights weak rings or seals.
What a shop does next
- Perform compression and leak-down tests to pinpoint ring or head issues.
- Check PCV operation and inspect turbo and intake piping for oil residue.
- Confirm consumption rate before recommending major teardown or rebuild.
| Issue | Sign | Shop action |
|---|---|---|
| Piston rings / cylinders | Loss of power, increased consumption | Compression / leak-down test |
| Valve stem seals | Blue smoke at startup, steady use | Inspect seals, valve guide check |
| Head gasket | Oil-coolant mix, overheating | Pressure test, replace gasket |
| Turbo seals | Oily piping, boost loss | Turbo inspection, intercooler clean |
Conclusion
Final checklist: note exact level readings, record miles between top-offs, then separate external leaks from internal burning by checking for drips, smoke, or oily intake parts.
Documenting the pattern makes a clear case for a targeted repair. Rapid loss is not normal; track miles-per-quart or miles-per-liter to show severity.
If you cannot find a source at home, schedule a professional inspection that includes a visual dye test, PCV check, and consumption verification. That saves time and prevents guesswork.
Prevent future trouble by using the correct spec oil, keeping scheduled changes, and building a simple dipstick routine. Catching small signs early avoids head work and costly repairs.
FAQ
How much oil loss is normal for a Volvo over typical mileage?
Most modern engines use a small amount of oil between services—often less than one quart every 1,000 to 1,500 miles. Slight top-offs between oil changes can be normal for high-mileage cars. Rapid drops, such as a quart in a few hundred miles, signal a problem that needs inspection.
What immediate effects does low engine oil have on performance?
Low oil reduces lubrication, raising friction and operating temperature. Expect rough idling, loss of power, increased wear, and potential overheating. Running the engine with persistently low oil risks severe damage like seized components or failed bearings.
How do I check oil level properly with the dipstick?
Park on level ground, shut the engine off for a few minutes, then pull the dipstick, wipe it clean, reinsert fully, and read the level. Compare to the marked range. Check regularly and before long trips. Use specified oil viscosity for accurate readings.
How can I track oil loss over time to spot patterns?
Record oil levels and miles at each fill-up or change. Note how many miles you drive between top-offs. Look for steady decline, sudden drops, or links to driving conditions like highway work or towing. Patterns help technicians diagnose leaks or internal burning.
What signs point to an external oil leak versus oil burning inside the engine?
External leaks leave visible oil spots, a greasy undercarriage, or wet areas around valve cover, oil pan, or filter. Burning oil produces blue-tinted smoke from the exhaust, a burning smell, or oily residue in the tailpipe. Both types can coexist, so check thoroughly.
Which warning lights indicate low oil and possible engine damage?
Oil pressure and check-engine lights can both appear with oil problems. An oil pressure warning means lubrication is compromised and requires immediate attention. A check-engine light may record misfires or emissions issues caused by oil burning.
What common external leak sources should a shop inspect on a Volvo?
Technicians typically check the oil filter and drain plug for loose fittings, valve cover gasket, camshaft seals, oil pan gasket, and oil cooler lines. Aging gaskets and improperly installed parts after service are frequent culprits.
How do mechanics confirm where an oil leak is coming from?
Shops perform a visual inspection, pressure-test the crankcase, and often use UV dye or a smoke machine. Cleaning the engine and then running it helps reveal the fresh leak path. Road tests and undercarriage lifts further pinpoint the source.
Can an oil leak be hidden without leaving spots on the ground?
Yes. Slow leaks can drip onto splash shields, suspension parts, or evaporate before reaching the ground. Oil can run along engine seams and collect in crevices. A thorough lift inspection or dye test usually uncovers these hidden drips.
How does the PCV system cause oil to enter the intake on Volvos?
The Positive Crankcase Ventilation system vents crankcase pressure into the intake to burn blow-by gases. If the PCV valve or breather is clogged or fails, pressure forces oil past seals into the intake tract, increasing oil consumption and causing smoke.
What symptoms indicate a failing PCV valve or clogged system?
Symptoms include whistling or hissing from the engine bay, dipstick sputtering on removal, oil leaks around the valve cover, rough idle, and increased oil use. Replacing the PCV valve and cleaning breather passages often resolves these issues.
How does oil get into the air intake or air filter housing?
Oil enters the intake through a faulty PCV system, turbocharger seals, or excessive crankcase pressure. It collects in the airbox, turbo inlet, or intercooler piping. Visible oil in these areas points to internal ventilation or seal failures.
Why does sludge and neglected service worsen oil-related intake problems?
Old oil breaks down and forms sludge that clogs PCV passages and oil return paths. Blocked ventilation raises crankcase pressure, pushing oil into the intake and accelerating seal wear. Regular oil changes prevent sludge buildup and related leaks.
How do worn piston rings cause oil consumption in the combustion chamber?
Worn rings or scored cylinder walls lose the seal between the crankcase and combustion chamber. Oil slips past into cylinders and burns, producing blue smoke, increased oil use, loss of compression, and reduced engine power.
What are the signs of failing valve stem seals or valve stem wear?
Failing valve stem seals often cause blue smoke on cold start and increased oil consumption between services. You may notice smoke clears after warm-up, which points to stem seal wear rather than ring failure.
Could a head gasket issue affect oil levels or quality?
Yes. A compromised head gasket can allow coolant to mix with oil, contaminating and thinning it. Symptoms include milky oil, overheating, white exhaust smoke, and rapid degradation of lubrication—requiring immediate repair.
How do turbocharged Volvo engines contribute to oil consumption problems?
Turbochargers rely on seals and pressurized oil feed lines. Worn turbo seals leak oil into the intake or exhaust, causing smoke and oily intercooler piping. Boost changes or loss of turbo performance may accompany these leaks.
Can using the wrong oil increase consumption or damage engine parts?
Using incorrect viscosity or poor-quality oil reduces film strength and worsens seal protection. Thinner oil can leak past worn components more easily and increase consumption. Always use the manufacturer-recommended oil grade and spec, such as Volvo-approved synthetic blends.
Which driving conditions raise oil use and stress engine seals?
High RPM driving, frequent towing, long uphill hauls, and sustained heavy loads increase crankcase pressure and operating temperatures, accelerating oil consumption and seal wear. Gentle driving and proper maintenance reduce stress on components.
When should I see a mechanic about unexplained oil loss?
Seek professional help if oil drops a quart within a few hundred miles, if you see smoke, smell burning oil, notice oil pressure warnings, or detect coolant contamination. Early diagnosis prevents major repairs and preserves engine life.
What diagnostic steps will a shop take when there’s no obvious external leak?
A shop will inspect the PCV system, perform a compression or leak-down test, check for turbo seal integrity, examine valve stem seals, and test for head gasket leaks. They may also use UV dye, smoke tests, and oil analysis to find the root cause.